Lambkin Goes To Spring Quilt Market!

It's that time again...Spring Quilt Market with all the preparations and excitement for new fabric lines, notions and products! I always anticipate Bonnie's new fabric lines and have the unique opportunity to get my hands on them before they hit the stores! I'm excited to share two little quilts made from the line, with a video, (below) sharing a few of my favorite sewing features on my machine.

Little Lambkin loves it!

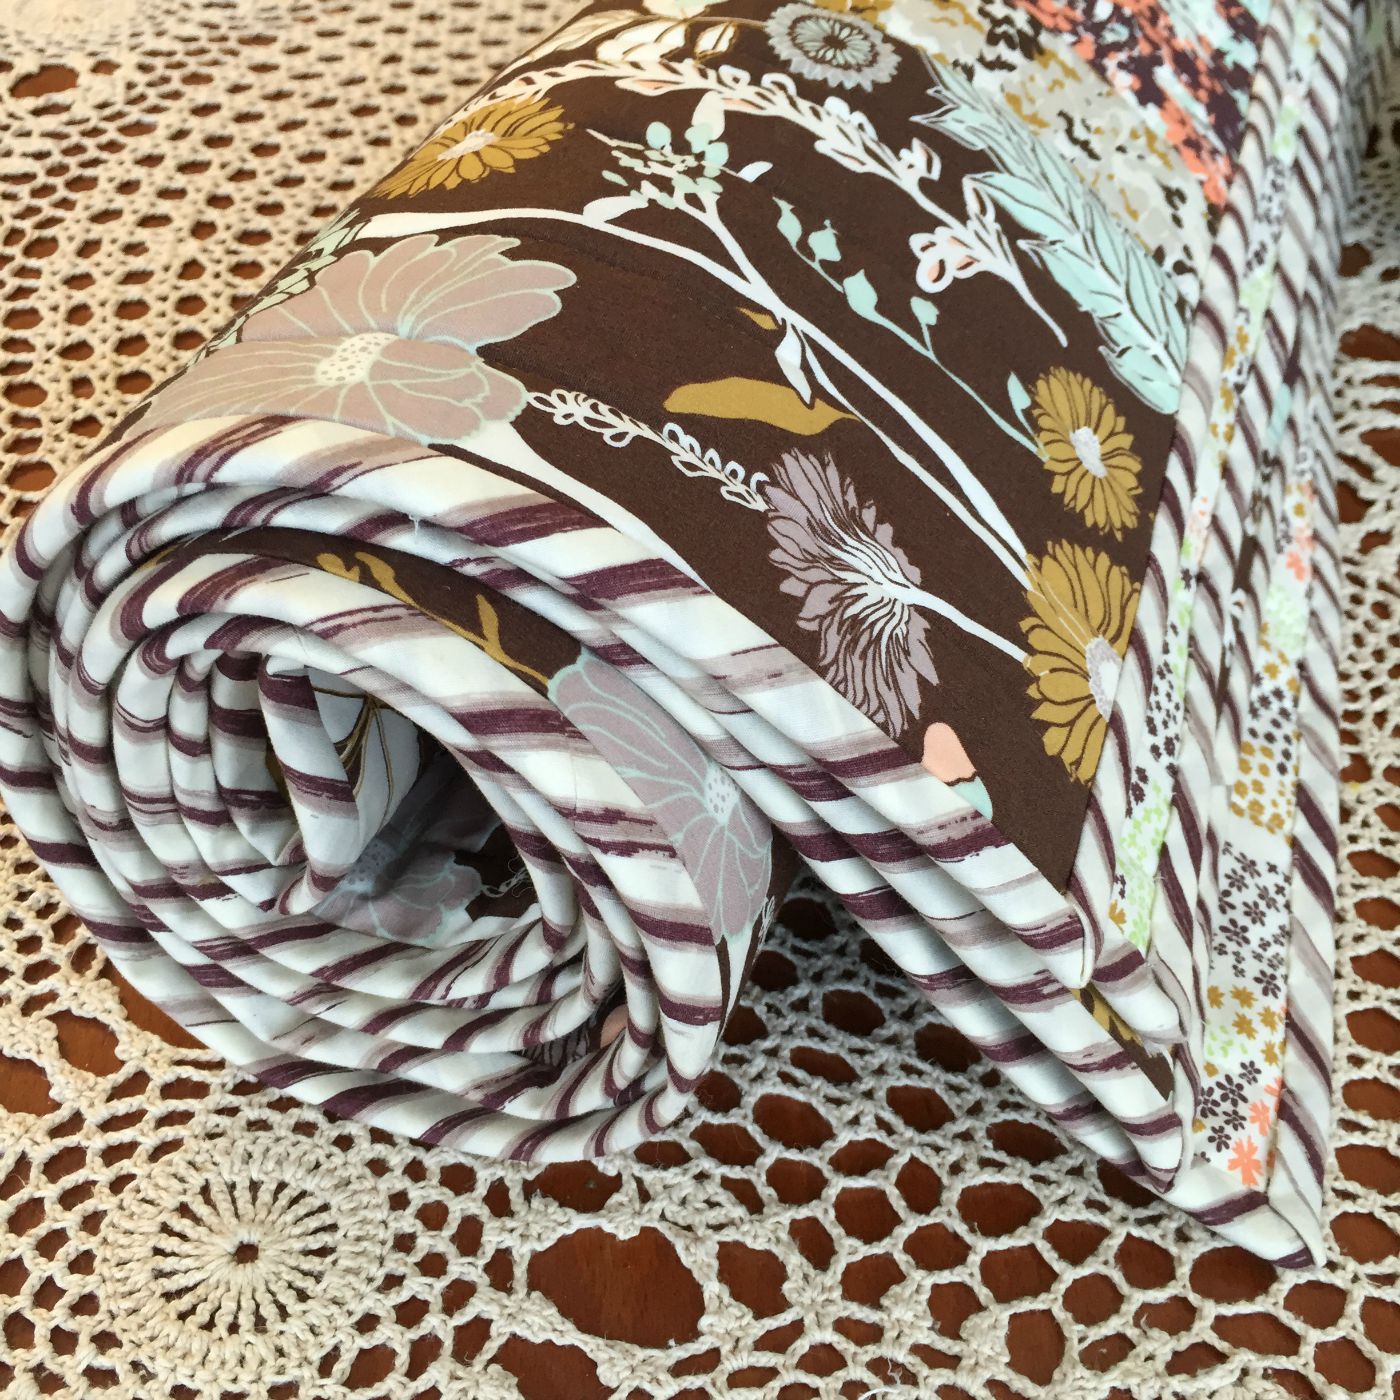
Bonnie's newest line, Lambkin, will be released by Art Gallery Fabrics in August, 2017, and it's justifiably as sweet as all her previous lines!

Lambkin Fabric by Bonnie Christine for Art Gallery Fabrics
Both Quilts.jpg

Both quilts are made using the new pattern, Orange Blossom, from Plum Easy Patterns by Bethany Miller. The petals are not fused in place, but sewn! Don't leave, please, I promise this is easy and that you'll love the technique Bethany uses! (I'll link to Bethany's video tutorial at the end of this post!)

Bethany uses freezer paper templates for perfect curved edges and seams. Her pattern is also layer-cake friendly for a scrappy look.

Orange Blossom Quilt by Plum Easy Designs

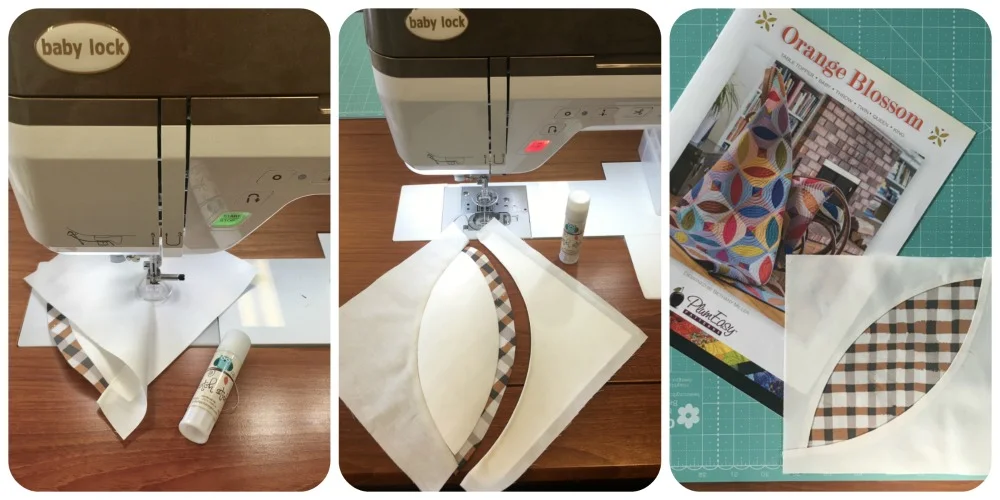
Let me share with you three of my favorite sewing features on Baby Lock's Destiny sewing machine (These features are available on several other Baby Lock models as well!)

Maxie shares three features on Baby Lock's Destiny sewing machine that make sewing easier, more accurate, and more fun!

Orange Blossom Blocks ready for assembly!
Orange Blossom by Plum Easy Patterns, made with Lambkin fabrics by Bonnie Christine for Art Gallery Fabrics

To view Bethany Miller's video tutorial for Orange Blossom Quilts click here! Thanks for visiting today! Happy sewing and God bless! Maxie

A Pincushion for My Daddy

You know that feeling when you hold an object in your hand that you’ve made. Some things are distinctive, and you know how that feels, too. Like this little pincushion. It's an unconventional memorial, I know, but this pincushion is dedicated to the memory of my father, who passed away March 12. As I share a little tutorial, let me also share why this is for Dad.

Juicy Goosey Paper Pieced block from Jeli Quilts

Juicy Goosey Paper Pieced block from Jeli Quilts

The pincushion came about because of a challenge hosted by my local Modern Quilt Guild. I ended up with all the solids shown, and we were instructed to make something using them all plus one additional fabric of our choosing. I chose Tim Holtz' Dictionary print as a background, and decided to check off a paper pieced block I'd been longing to make: Juicy Goosey, designed by Jeli Quilts.

Four paper pieced sections.

 Even though I have sold about 12 bolts of this particular fabric in my quilt shop, I had never read the words on the dictionary fabric. But as I began to piece the tiny 2" sections, I noticed the word "memory" landing in my focus over and over. Each time I saw it, I thought of Daddy, who had been in memory care for several months before he passed. The entire project stirred up so many memories of him, and I thought of him every minute I sewed. Lots of minutes...

4" paper pieced block.

Memory care is hard. Hard on families, hard on caregivers, but hardest on the sufferer. Although Dad never forgot who his family was, the only other thing he could remember was that he was not with Mom. They had been separated for six months because my mother had sustained brain trauma in a car accident, requiring full time skilled nursing care. I brought her to North Carolina to be near me, but dad remained in Georgia while I worked out his transfer to my town. When I finally was able to bring him to North Carolina, I arranged a meeting with mom. It was the sweetest day. Dad was strong for the 30 minute ride to Momma's facility. Every day for six months his only goal had been to get to Mom, and this day had finally come to fulfillment. Their visit was beautiful; they were both so happy, embracing while the family and nurses watched and cried.  Mom's doctor said it was "the most touching scene of love and devotion he had ever seen". 

Thought you'd like to see the back side. Mmmmmhhhhhmmmm.

Thought you'd like to see the back side. Mmmmmhhhhhmmmm.

It took just about everyone present to get dad to the car to head back to my town, but he finally agreed to leave Mom and we headed back to his home. The next day, Dad wasn't himself. He continued to decline and passed away 10 days after that visit with Mom. They never saw each other again, but Dad spoke of the visit often, and how beautiful Mom was. Hospice felt that he had been holding on to see Mom just one more time. I will always be thankful for that meeting, and for bringing him to my town.  I cherish the time spent with him during the last few weeks of his life, and recalling our visits as I sewed this little pincushion has been such a blessing.

I decided to add yellow piping to the top edges around my little block. Baby Lock's mini piping foot made short work of that task, both in creating the piping and attaching it to the edge of the little paper pieced square. I also used this foot when sewing the sides to the block, because the piping stayed right in the groove, keeping the seam straight and close to the piping. Click on the photo, left, to read more about this helpful little foot.

After applying the piping, I attached the sides and bottom. The top of the pincushion measures 4.5", so I cut four sides 4.5" x 2.5". I cut a 4.5" square for the bottom piece.

The sides are attached separately, placing each one on the pincushion top (right sides together) and stitching the seam, leaving a 1/4" seam allowance unsewn at the beginning and end of the seam (as shown in the first photo, below). Be sure to secure the seam with a knot or back stitch at each end. Sew all four sides on.  Next, sew the short sides together, leaving the 1/4" seam allowance unsewn at both ends in the same manner (last photo).

Sewing a box pincushion.

The bottom is sewn on in the same way, leaving about 2" unsewn on one side for turning and stuffing. Slipstitch closed.

So, Daddy, every time I use my pincushion I'll be thinking of you. Thank you for all you meant to me. I walked into Momma's room the other day to find her clutching your photo to her heart. I promise to take care of her until you're together again and never have to be apart.

Thank you for

  • Never telling me that I sewed the buttons and buttonholes to the wrong side of your shirts I made for you. You wore them proudly.
  • Surprising me with money for the expensive puppy I wanted.
  • Believing that I could sing, and buying me a guitar. I pushed through the lessons, mostly to please you.
  • Lots of airplane rides, and even one glider ride. You were a great pilot and I always felt safe.
  • Loving my peach pie.
  • Letting me bring you a bowl of ice cream and cookies every night to the sofa. (How did you stay so thin?).
  • Making a cradle for my baby, and beautiful fabric display tables for my quilt shop.
  • Driving me to church every Sunday without fail when I was a teenager. Oh, how I wanted you to go to church with me.
  • Giving your life to the Lord, finally.

I could go on and on. I'll love him forever.

Thanks for visiting. Happy sewing and God bless! Maxie


My Turn on Bonnie Christine's Succulence Blog Tour!

My day is here! I'm happy to, once again, participate in one of Bonnie's blog tours for her fabrics. This tour features her most current line for Art Gallery Fabrics, Succulence. You'll find all Bonnie's fabrics, including these, available with free shipping at my quilt shop, A Stitch in Time! And, did you know that I'm blessed to be Bonnie's mother?

Bonnie Christine's Succulence Blog Tour

I love the colors and prints in this line so much that I decided to use it to check off one of the quilts on my bucket list! I have wanted to make a Winding Ways quilt for years, but I just couldn't make myself take the time to do all the precise curved cutting. Hmmm...I do have an AccuQuilt machine, and to my delight I found that they make the Winding Ways die! Oh heaven. AccuQuilt recommends cutting six layers in one pass, but I found that the fine pima cotton that Art Gallery produces allowed me to cut eight! (I can cut at least 9 binding strips in one pass, too, using the 2 1/2" strip die!)

Cutting the Winding Ways Quilt with the Accuquilt

For the AccuQuilt machine, I cut 10" strips, width of fabric, and found that folding them in half fit perfectly on the die. I layered two dark fabrics and two light fabrics, yielding 4 blocks in about 30 seconds! Some people ask me, "Do you waste fabric with the AccuQuilt?" My answer is, "Maybe a little...but I don't waste any time!" And each piece is cut perfectly, with notches for matching together.

This quilt block is 100% curved piecing. Wait! don't leave me! I promise it's easy and I made a short video to show you how easy it is. Click here to view it.

Winding Ways Quilt. Succulence Fabrics by Bonnie Christine forArt Gallery Fabrics

The magic happens in this quilt by making two versions of the same block: a dark center with light corners, and a light center with dark corners. The effect is quite entertaining, to me, because my eyes just won't stay still when I look at it!

Winding Ways for the Succulence Blog Tour
Bonnie Christine's Succulence Blog Tour

I quilted in the ditch to accent the design, and to keep a soft feel. I used one of Bonnie's voile fabrics for the back to make it extra soft!

For now, this one will live on the wall in my sewing room because it just makes me happy...and because it makes me think of Bonnie. Do you have a quilt on your bucket list?

Maxie Makes Sewing Studio

Be sure to visit yesterday's post by Ali Brorsen and see her beautifully sewn projects and her angelic model. Tomorrow's stop is Michelle Cain at From Bolt to Beauty.  See the full lineup, and read more about the blog hop on Bonnie Christine's blog, Going Home to Roost.

Thanks for visiting! Happy sewing and God bless. Maxie

Sewing No-Baste Hexies

Hexies are everywhere in the quilting world. While certainly not a new idea, the Modern Quilt Movement has breathed new life into this time-honored little patch.

Allison Glass and Hexies

Grandmother's Flower Garden would stand up and cheer, seeing all the innovative ways these six sided scraps are being used. So, when our local Modern Quilt Guild challenged us with this lovely Allison Glass print, I thought a rainbow of hexies would mix nicely with it!

Most quilters are familiar with the English Paper Piecing method of wrapping fabric around hexagon papers, hand basting the fabric from the back side to hold it to the paper. The hexagons are then stitched together by hand. But I wanted to individually applique´my hexagons around Allison's circular rainbow, and I wanted to skip the hand basting. So, here is my no-baste method of making hexagons:

For this method, I use a spray starch alternative. My favorite is a product called 'Flatter'. It has no fabric protectants, no starch, is plant derived and non-toxic. Spray a small amount into a dish and get a paint brush handy. Center a hexagon paper on the wrong side of your hexagon fabric (I cut it into shape by holding the paper on top of the fabric and roughly cut a hexagon shape around it, leaving a good 1/4" seam allowance around the edges of the paper. (First photo.)

Next, using the paint brush, lightly brush 'Flatter' onto the seam allowance of the fabric. Let it soak into the seam allowance of the fabric, making sure the area that will fold over the paper edge is wet. (Center photo.)

Press all six edges over the paper, working around the hexagon one side at a time. (Third photo.)

Finishing the Hexie

The first photo, above, shows all six sides crisply pressed toward the back side of the hexie. The second photo shows the hexie from the front side. Press well.

The last step is to pin in place on your background fabric. I found the 'Flatter' spray starch made the fabric crisp enough to remove the paper before stitching to the background. I just pinned in place and hand stitched the folded edge of the hexagon to the background (machine stitching with your favorite method would also be nice). Alternately, you may leave the papers inside for this step; after the hexie is stitched in place, make a slit in the background fabric (underneath the hexie) and slip the paper out.

I'll show you the finished project in my next blog post, so please visit again on Friday!

Thanks for stopping by. Happy sewing and God bless! Maxie

The Zippy Strippy Quilt

Need a fast, easy quilt design? This is it...make it in an evening, quilt it and bind it the next day. Honestly, it's that easy! I designed this pattern to showcase larger print fabrics that seemed just too pretty to cut into smaller pieces. Because you can utilize 14 different prints,  I've used it several times at my quilt store when I needed to show how a full line of fabric plays together. I call it Zippy Strippy, and you can see it below in Bonnie Christine's Cultivate fabric that she designed for Art Gallery Fabrics. Measuring at about 60" x 72", it's perfect for a sofa throw or youth bed. If you like it, you'll find the pattern on my downloadable pattern page!

Cultivate fabrics by Bonnie Christine play together beautifully in this fast, easy quilt.

Simple, straight line quilting with 100% organic cotton batting, and co-ordinating fabric on the back kept this quilt soft, drapey and snuggly! If you've ever sewn with Art Gallery's fabrics, you already know the difference their pima cotton makes in all your projects from quilts to clothing!

Zippy Strippy Quilt in Cultivate Fabrics by Bonnie Christine.

I used 12 fabrics for the center strips and two for the two side borders. Actually, there is a 15th fabric used for the bias binding! Isn't this little stripe great? We've included it in the kit, along with all the fabric shown for the top. Backing is available separately.

Bias binding from Cultivate fabrics by Bonnie Christine.

Thanks for visiting! Happy sewing and God bless! Maxie

Â