
I think this is going to be perfect for me. That's what sewing is all about, right? These colors and fabrics are what I love to work with.

And, with these fabrics, I'm going to show you two of my favorite presser feet for my Baby Lock sewing machine. Chances are good that you can find these feet for your sewing machine, too.

The presser foot on the left is the Gathering foot, and the presser foot on the right is the Narrow Rolled Hemmer. They are both pretty remarkable, and easy enough to use! We'll begin with the Narrow Rolled Hemmer, so let's place that on the machine.
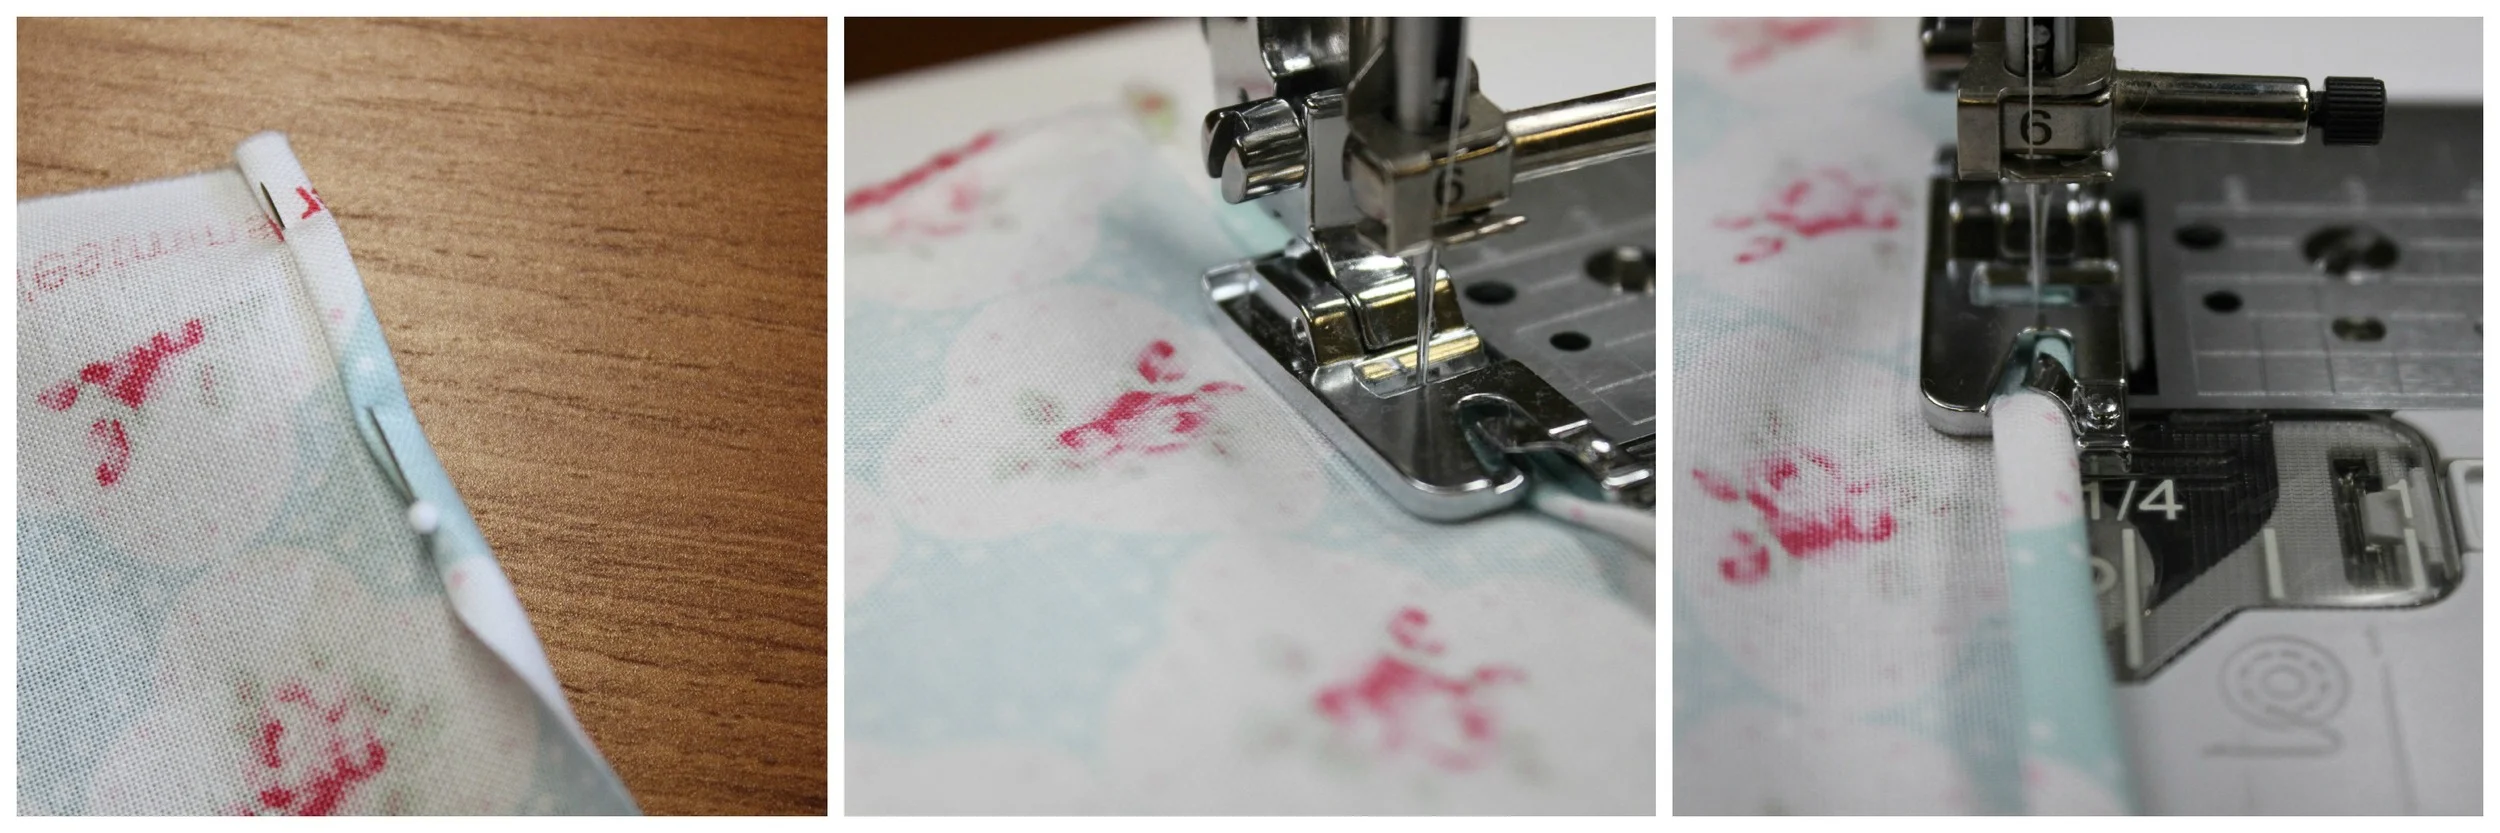
I've cut the blue floral print into a strip about 4 1/2" wide, across the width of fabric. I am going to use the narrow rolled hemmer foot to finish both long edges of the strip. In the first picture, above, I have folded the edge over 1/8" two times and pinned it in place to hold the first inch or so. In the middle picture, I am stitching that first inch, very close to the edge of the fold. Next, with the needle in the down position, I lift the presser foot and gently tug the raw edge of the fabric up into the curled opening in the foot. This rolls the edge of the fabric and holds it for stitching. You can see the rolled fabric in place in the last picture. Tip: stitch slowly and watch the folded edge under the needle. If necessary, adjust the needle placement one space to the right.

Just look at that very precisely stitched hem! Stitch both long edges. Hem the short ends by folding in 1/2" twice and stitching in place. I like a little deeper hem on the sides, so I don't use the Narrow Hemmer for this step. With a fabric marker that has removable ink (I like this one), draw a line 1" away from the edge on one long side. (Right photo.) This will be the gathering line. Replace the Narrow Hemmer foot with the Gathering foot.
Before gathering, a few adjustments need to be made on the machine. First, choose a straight stitch and place the needle in the far left position. Increase your stitch length to about 4 or 5, and increase your tension to almost as high as it will go. I do recommend that you practice on a strip to see that you like the amount of gathers you're achieving, because fabrics of different weights and types gather differently. The longest stitch length and highest tension settings yield the most gathers. Sheer fabrics won't need as high a tension setting as regular weight cotton.
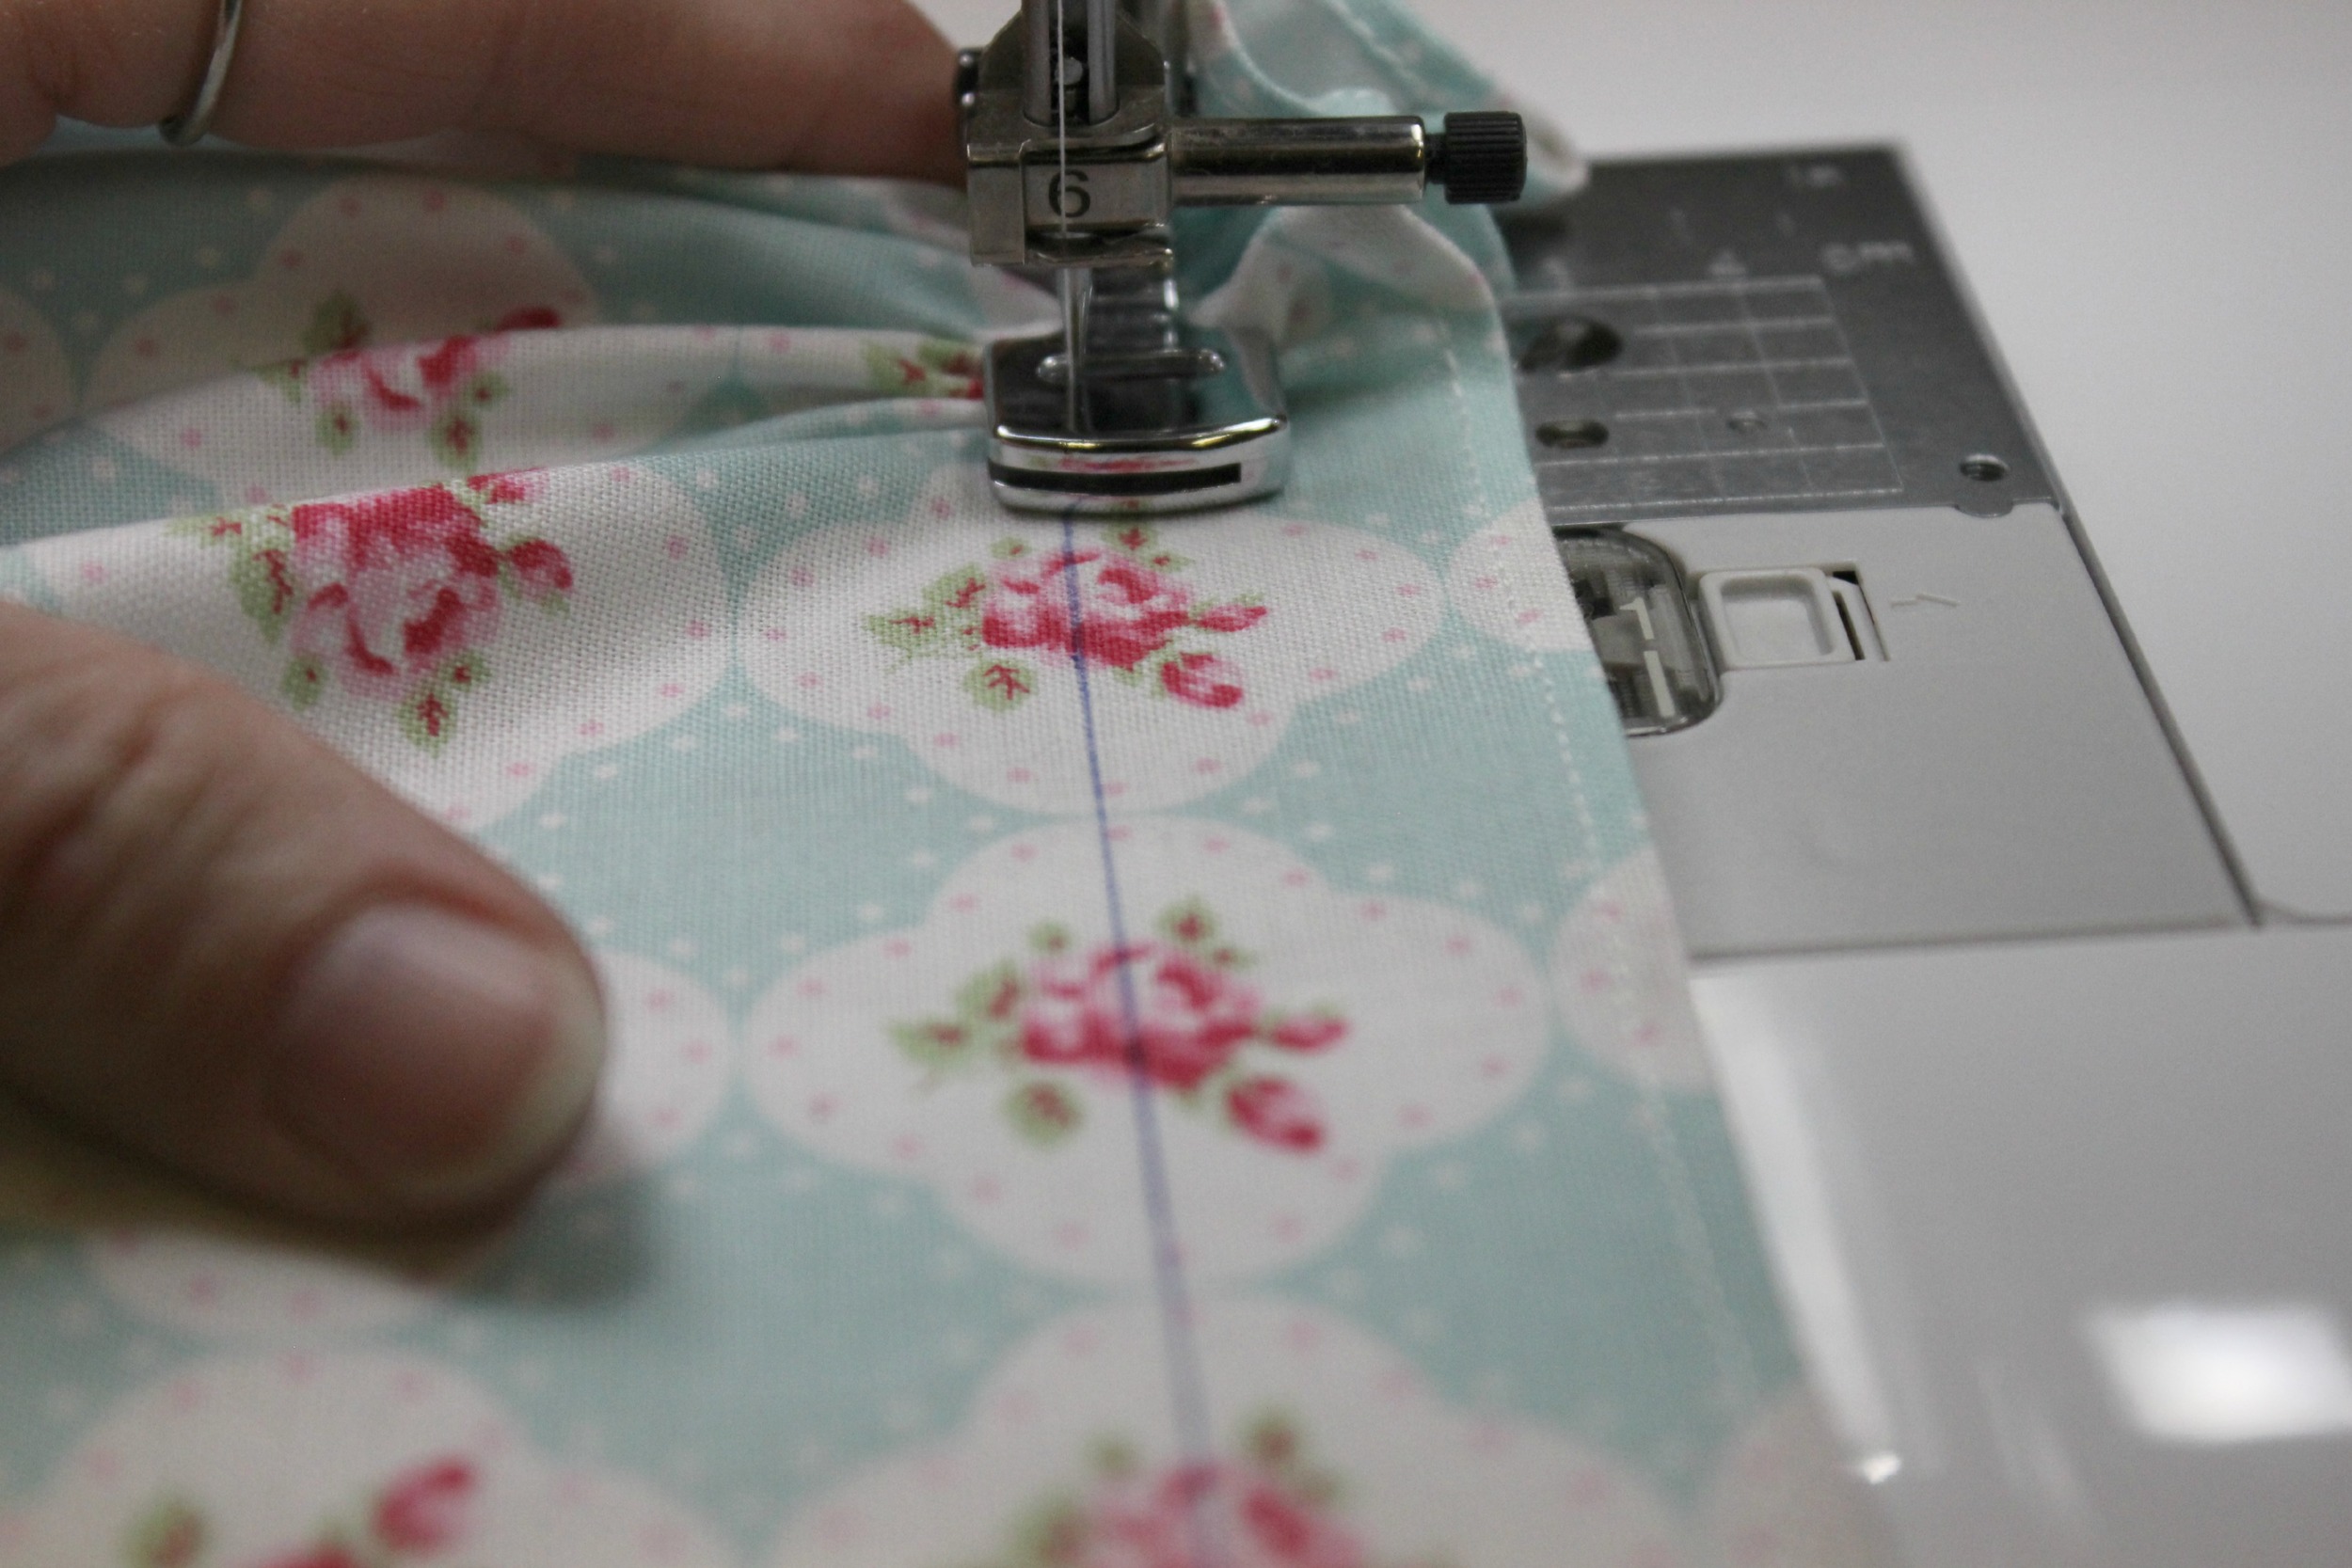
Place the fabric underneath the Gathering foot, right side up. With the needle aligned with the drawn line, begin to stitch. Gathers will magically feed out the back of the presser foot! To increase the amount of gathers, simply place your finger behind the presser foot and hold the fabric against the back of the foot, as shown above. Leave thread tails long enough to allow you to adjust the gathers, if necessary.

I'm attaching this ruffle to this lovely teal tea towel. Using the fabric marker, draw a line about 2" up from the end. Pin the ruffle in place with the upper hemmed edge on the drawn line. Stitch to the towel on the gathering stitches. Next, I placed rick rack over the gathering stitches and stitched it in place. Finished! It's just perfect for me.

So, find some fabric and a lovely tea towel that suits your liking and make one that is perfect for yourself. Then enjoy a cup of tea. Thanks for visiting! Happy sewing and God bless! Maxie
